4.9 1890+ Google Reviews
As a homeowner, you take pride in maintaining the safety and integrity of your property. One often overlooked aspect of home maintenance is the condition of your roof. Although exposed roof nails seem minor, they can lead to significant problems if left unattended. So, let's dive into what exposed roof nails are, why they pose a threat, and provide valuable insights on how to repair them effectively.
Exposed nails in your home inspection report refer to any visible nails in the roofing materials. This could refer to exposed nail heads, loose nails, or nail pops. Although this is most common with asphalt shingles, any exposed roof nails on any roofing material are a defect.
The most common reason for exposed nails is improper installation by the roofing company. And the most common location for this is the ridge or peak. Generally, overlapping shingles conceal the underlying nails. However, at the ridge, there will always be at least one shingle that will not have a shingle installed over it. Most professional roofers seal those last nails with roofing cement. But it’s easy to forget or assume it won’t be a big deal.
In addition, some homeowners attempt to save money by choosing a cheap company or doing the roof themselves. Since roofs are relatively expensive to replace, this is understandable. However, they may not cover the nails if the new shingles aren’t lined up perfectly with a chalk line, laser line, or other method.
Improper nailing patterns can leave nails exposed. Every shingle manufacturer creates a nailing zone. Likewise, any nails driven outside that zone will likely end up exposed.
Nail pops and under-driven nails are two different defects, but they create the same problem – exposed nails
First, nail pops come from expansion and contraction of the wood pushing the nail out. They occur more frequently with the use of improper (short) nails, but all nails are susceptible.
On the other hand, under-driven nails come from roofers. Specifically, a poorly set nail gun leaves them sticking up a little bit, and they eventually puncture the shingle above. In either case, they’re now exposed, creating leak points and making the shingle prone to damage from high winds.
Sometimes, everyone does everything correctly, and you still end up with exposed nails. This is because the most common fix for exposed nails is a dab of asphalt cement. Although this is a widely accepted practice, it's not a permanent solution. Specifically, asphalt cement generally lasts 10-15 years but less in harsh weather. In contrast, asphalt shingle roofs last 20-40 years. Accordingly, without regular roof inspections and maintenance, exposed nails are inevitable.
That's why many home inspectors describe roofing cement as a temporary fix.
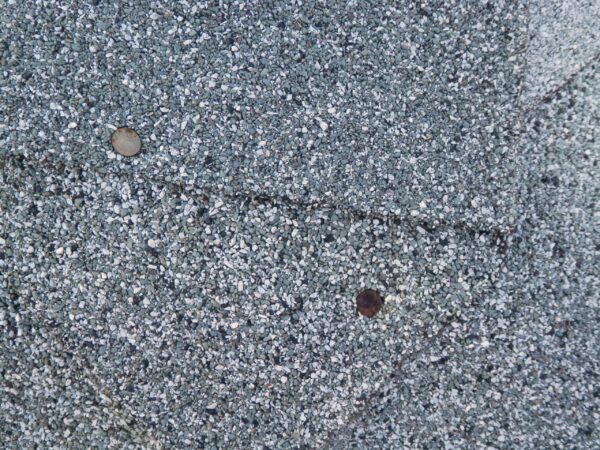
One common cause of roof leaks and subsequent water damage is exposed roofing nails.
This is because as an exposed nail rusts, it shrinks, creating a path for water around it. In extreme situations, expanding and contracting forces loosen and push the nail out. Then, you're left with nail holes. Additionally, exposed nails from shingle nail pops, underdriven nails, and other installation errors make the roof prone to missing shingles and further roofing damage.
Simply put, exposed roof nails cause leaks and damage to your home.
Repairing exposed nails is simple and prevents costly repairs.
Includes paid links