4.9 1890+ Google Reviews

Buying a newly constructed home is a thrilling experience, but there’s more to it than choosing floor plans and paint colors. Most people know about the home inspection, but the pre-drywall inspection is one crucial yet often overlooked step. This inspection occurs after installing the framing, plumbing, electrical, and HVAC systems—but before the insulation and drywall go up. Performing a thorough pre-drywall inspection ensures your home’s core structure is sound, saving you significant time and money.
A pre-drywall inspection (framing inspection, construction-phase inspection) is a comprehensive review of the home’s mechanical and structural elements before they’re concealed behind drywall. Inspectors look at everything from framing, wiring, and plumbing to HVAC ductwork, insulation, and sheathing.
The best time to do it is right before the insulation goes in.
Typically, the pre-drywall inspection is scheduled:
The window for this inspection is relatively short, so timing is essential. Work closely with your builder or real estate agent to schedule the inspection before the walls are sealed.
The inspector will examine various aspects of your home’s infrastructure during a pre-drywall inspection. Here are some of the most common areas they focus on:
Check for damaged, bowed, or cut framing members
Ensure framing is installed to industry standards
Check foundation anchor placement and installation
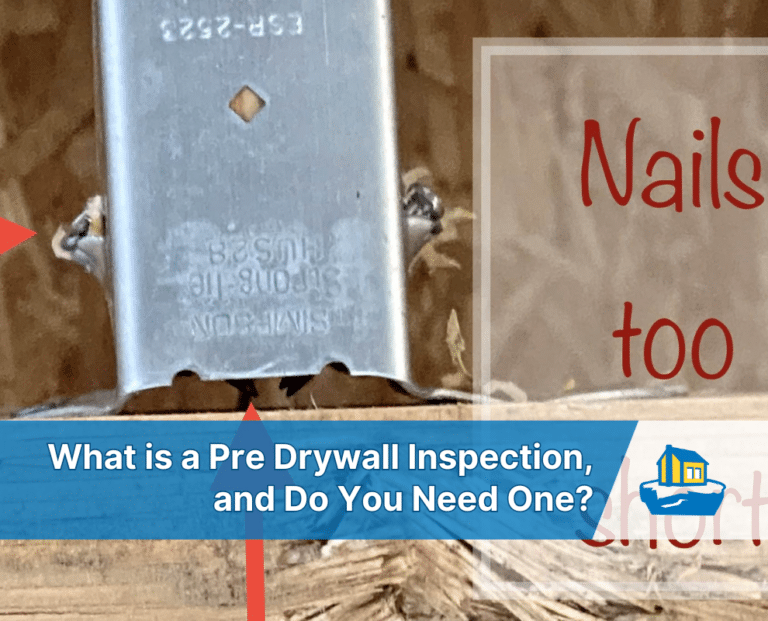
Ensure all joist hangers, hurricane straps, and other brackets have proper hardware.
Confirms all windows, doors, and openings in load-bearing walls have jack studs, king studs, and headers without excessive gaps
The videos below exhibit defects with floor joists, exterior framing, flashing tape, electrical work, plumbing lines, the laundry room, and many other components. Of course, this professional service includes a detailed report of all the issues I found.
Every industry is plagued with the “not my job” mentality. When the drywall contractors show up, they are not going to slow down or halt their job if they see any defects. They might not even see them. They are there for one purpose, and that is to install drywall. Any defects that exist will be hidden until they start exhibiting symptoms. The symptoms could be immediate or take years to develop.
The city building inspector assigned to your neighborhood has hundreds of other homes to check. They are often overworked and have zero liability for any missed defects. In short, a county inspection isn't the type of inspection that provides peace of mind. A third-party inspector will spend more time, and exercise a higher level of detail. A good home inspector is familiar with local building codes, best practices, and industry standards. Plus, they will be able to identify defects in the framing and other safety issues.
Even if your project manager offers a final walk-through, a dedicated pre-drywall inspection can uncover problems that may be hidden once construction progresses. Common issues that can arise include:
Catching these issues early ensures they’re corrected before the drywall goes up, saving you from unexpected repairs or remodels once you’ve moved in.
Additionally, you will want to make sure you get a final inspection. As noted, the county inspector may not find everything. The final inspection will include all the major systems and a comprehensive report.
Attend the Inspection: If possible, walk through the property with your inspector. This firsthand look helps you understand the home’s skeleton and ask questions in real-time.
Take Photos and Notes: Document everything. Photos can be beneficial if you need to reference wiring or plumbing locations in the future.
Ask for Clarification: If you spot something that seems off—like an oddly placed electrical outlet or missing insulation—ask your inspector for insight.
Follow Up with Your Builder: After you receive the inspection report, discuss any concerns with your builder. Reputable builders should address issues before proceeding to the next construction phase.
Don’t Skip Future Inspections: The pre-drywall inspection is vital, but it shouldn’t replace the final inspection or other recommended checks during construction. Each phase serves a different purpose in ensuring your new home’s quality.
Costs vary depending on your location and the size of your home, but a pre-drywall inspection typically ranges between $200 and $500. While this adds an extra expense to your home purchase, it’s often a small price to pay compared to the potential cost of major structural or mechanical repairs if issues go unnoticed until after you move in.
A pre-drywall inspection is a critical step in the home building process to ensure your new construction home’s long-term durability, safety, and efficiency. By identifying potential issues before drywall is installed, you can address them early, saving money and stress. Whether working with a seasoned, reputable builder or buying your first home, investing in a pre-drywall inspection is an invaluable move toward securing a well-built property.